Introduction
These 3D-printed models are designed specifically for Bambu Lab P2S and P1S printers.
If you are using another enclosed printer model, please design the parts yourself.
This 3D printing system adopts a modular design, consisting of a main frame and multiple functional modules.
Due to the different dimensions of P2S and P1S, the length and width of the main frame will vary accordingly.
All modules are interchangeable. Depending on your usage scenario and personal preference, you may choose which modules to print and install.
3D Model Downloads: Maker World
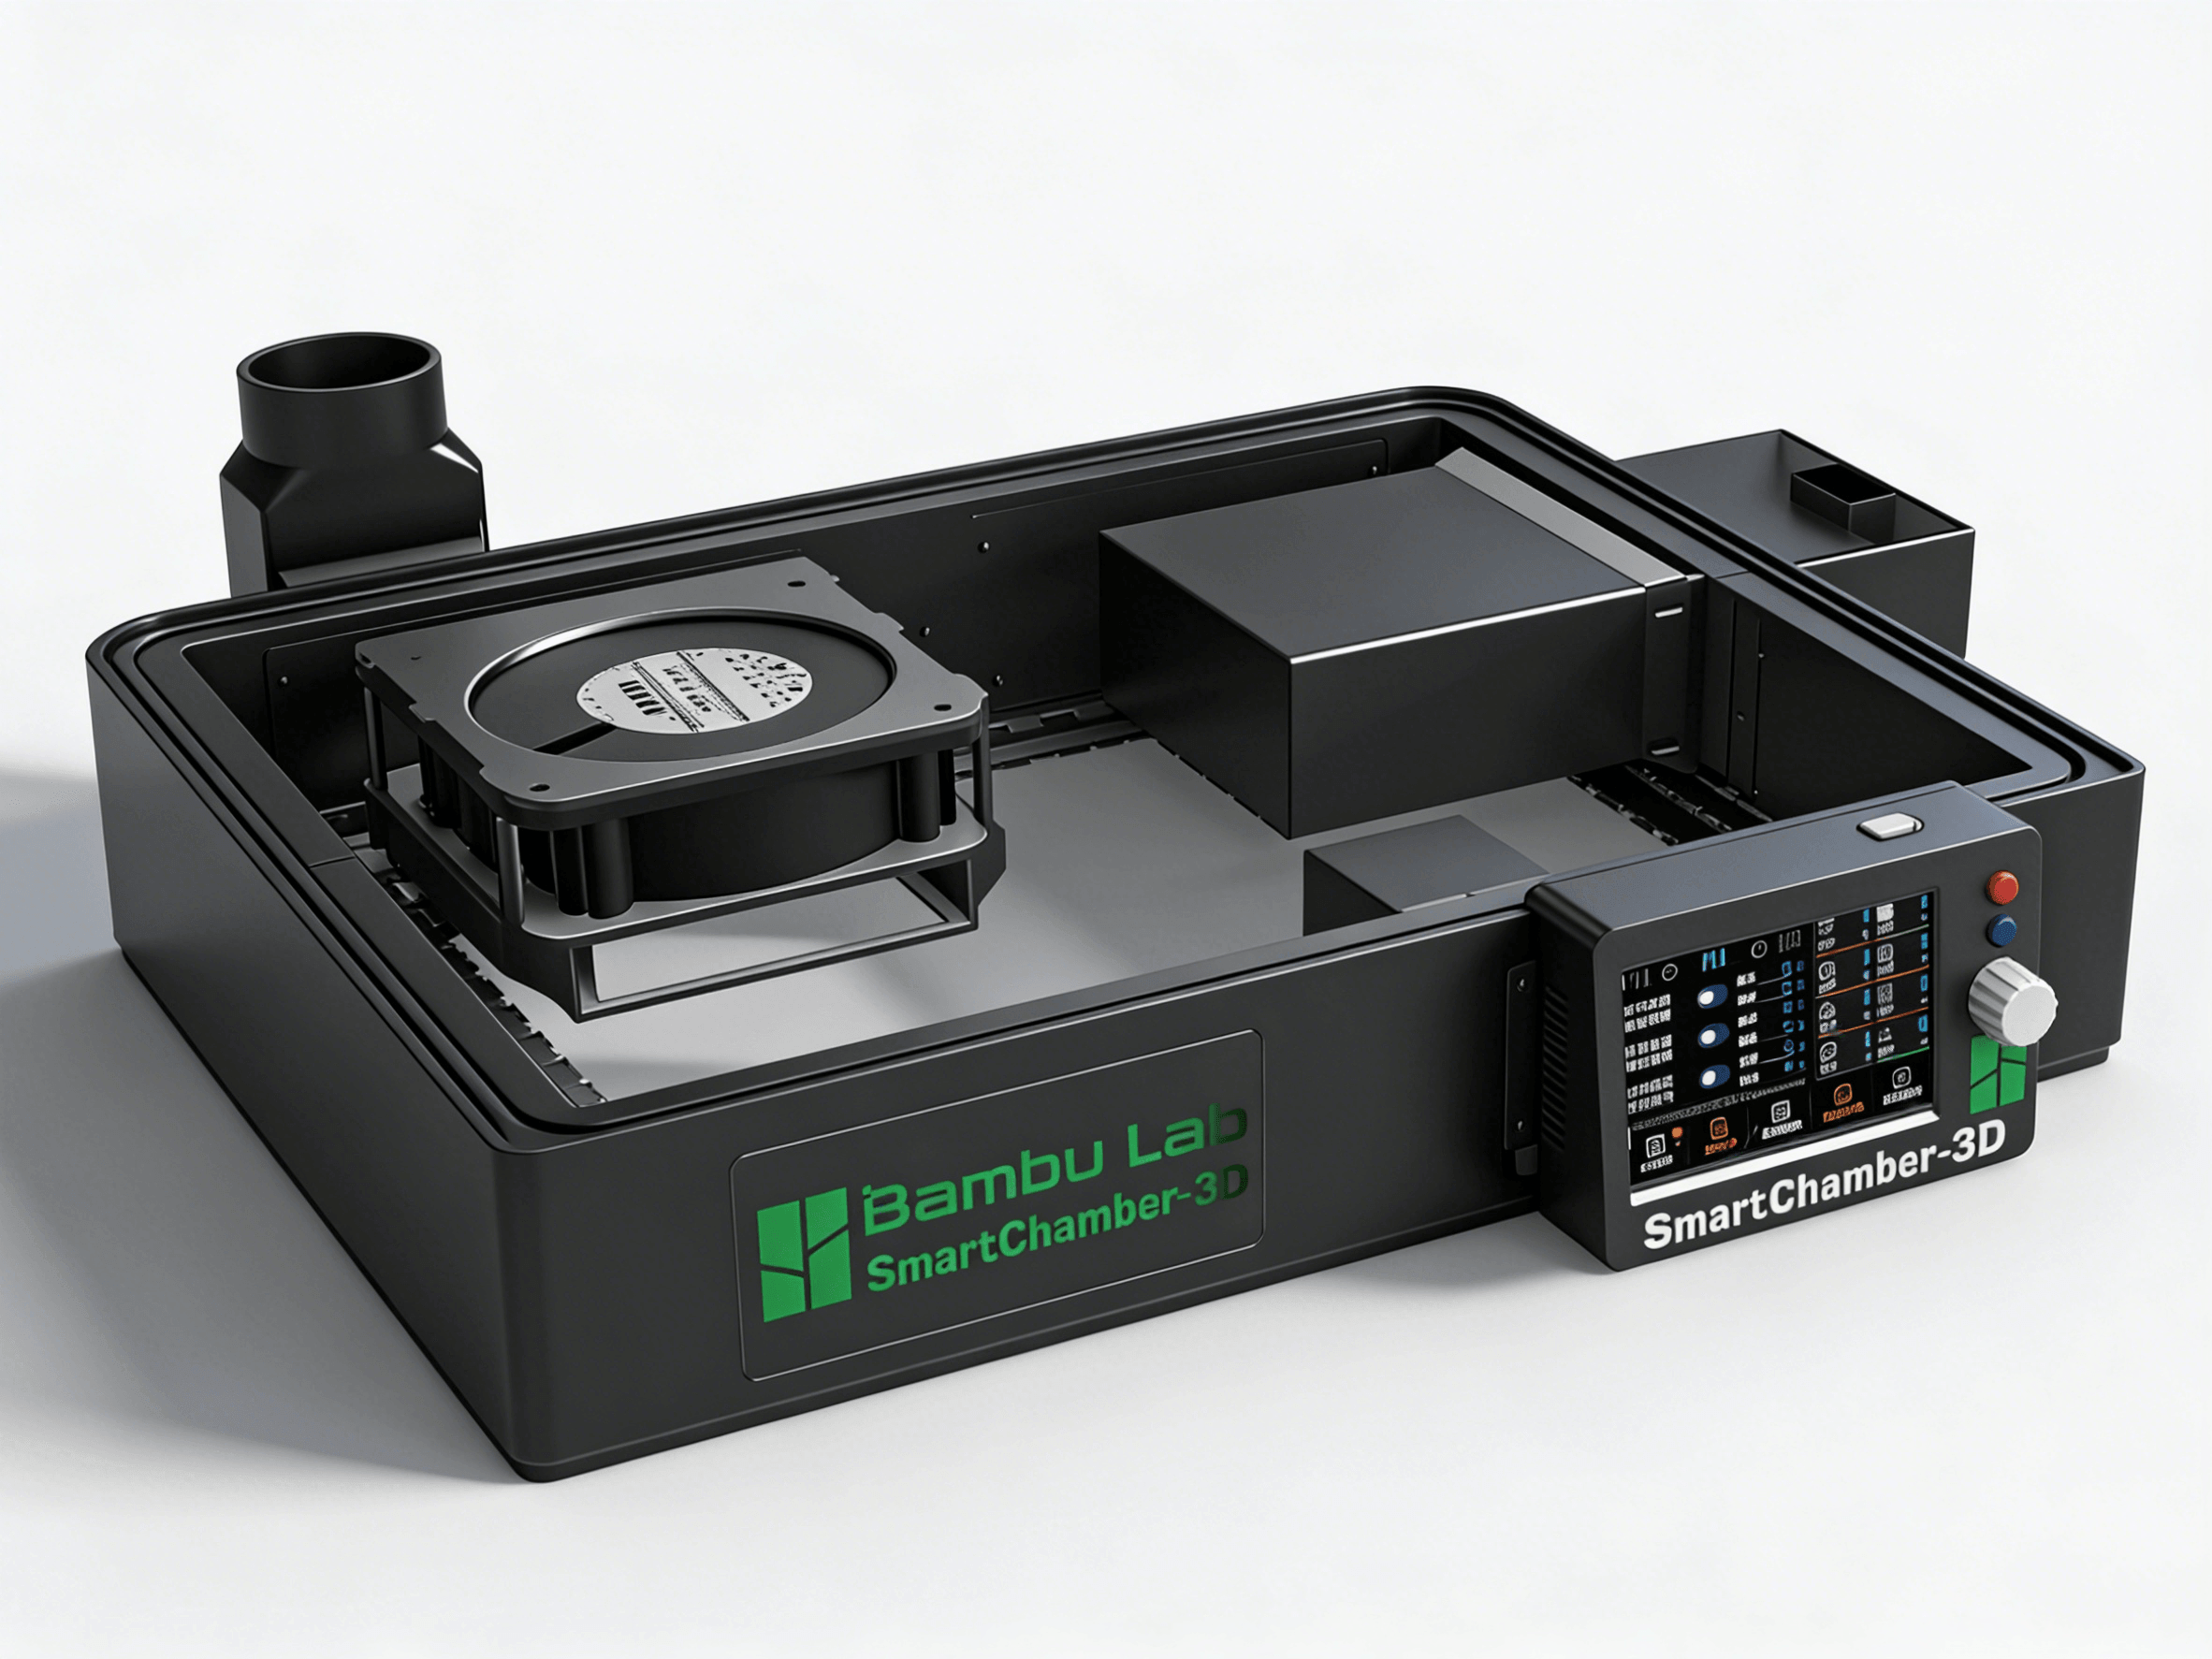
Module Descriptions
- Main controller module: installs the main control board, screen, and main control board fan.
- Exhaust module: installs the exhaust fan and HEPA filter.
- Power module: installs the XT60 power input socket.
- Drawer module: stores printer-related tools.
- Pegboard module: for mounting various pegboard accessories (search on model sites).
- Blank module: placeholder or cosmetic filler.
- LOGO module: decorative use.
Printer Compatibility
This 3D printing system supports Bambu Lab P2S, P1S, and X1C printers. X1C users should use the P1S printing parts.
Printing Suggestions
- The main frame is recommended to be printed in PETG.
- The heater module is recommended to use higher heat-resistance materials (PETG, ABS, PA, etc.).
- After printing, test-fit parts to confirm hole alignment and heat-set insert compatibility.
Suggested Installation Order
- Install the main frame.
- Install the power module.
- Install the exhaust module.
- Install drawer/pegboard/LOGO modules.
- Install the main controller module.
- Install the heater module.
- Finish with overall wiring and cable management.