Heater Module (V2) Installation
V2 Improvements and Advantages
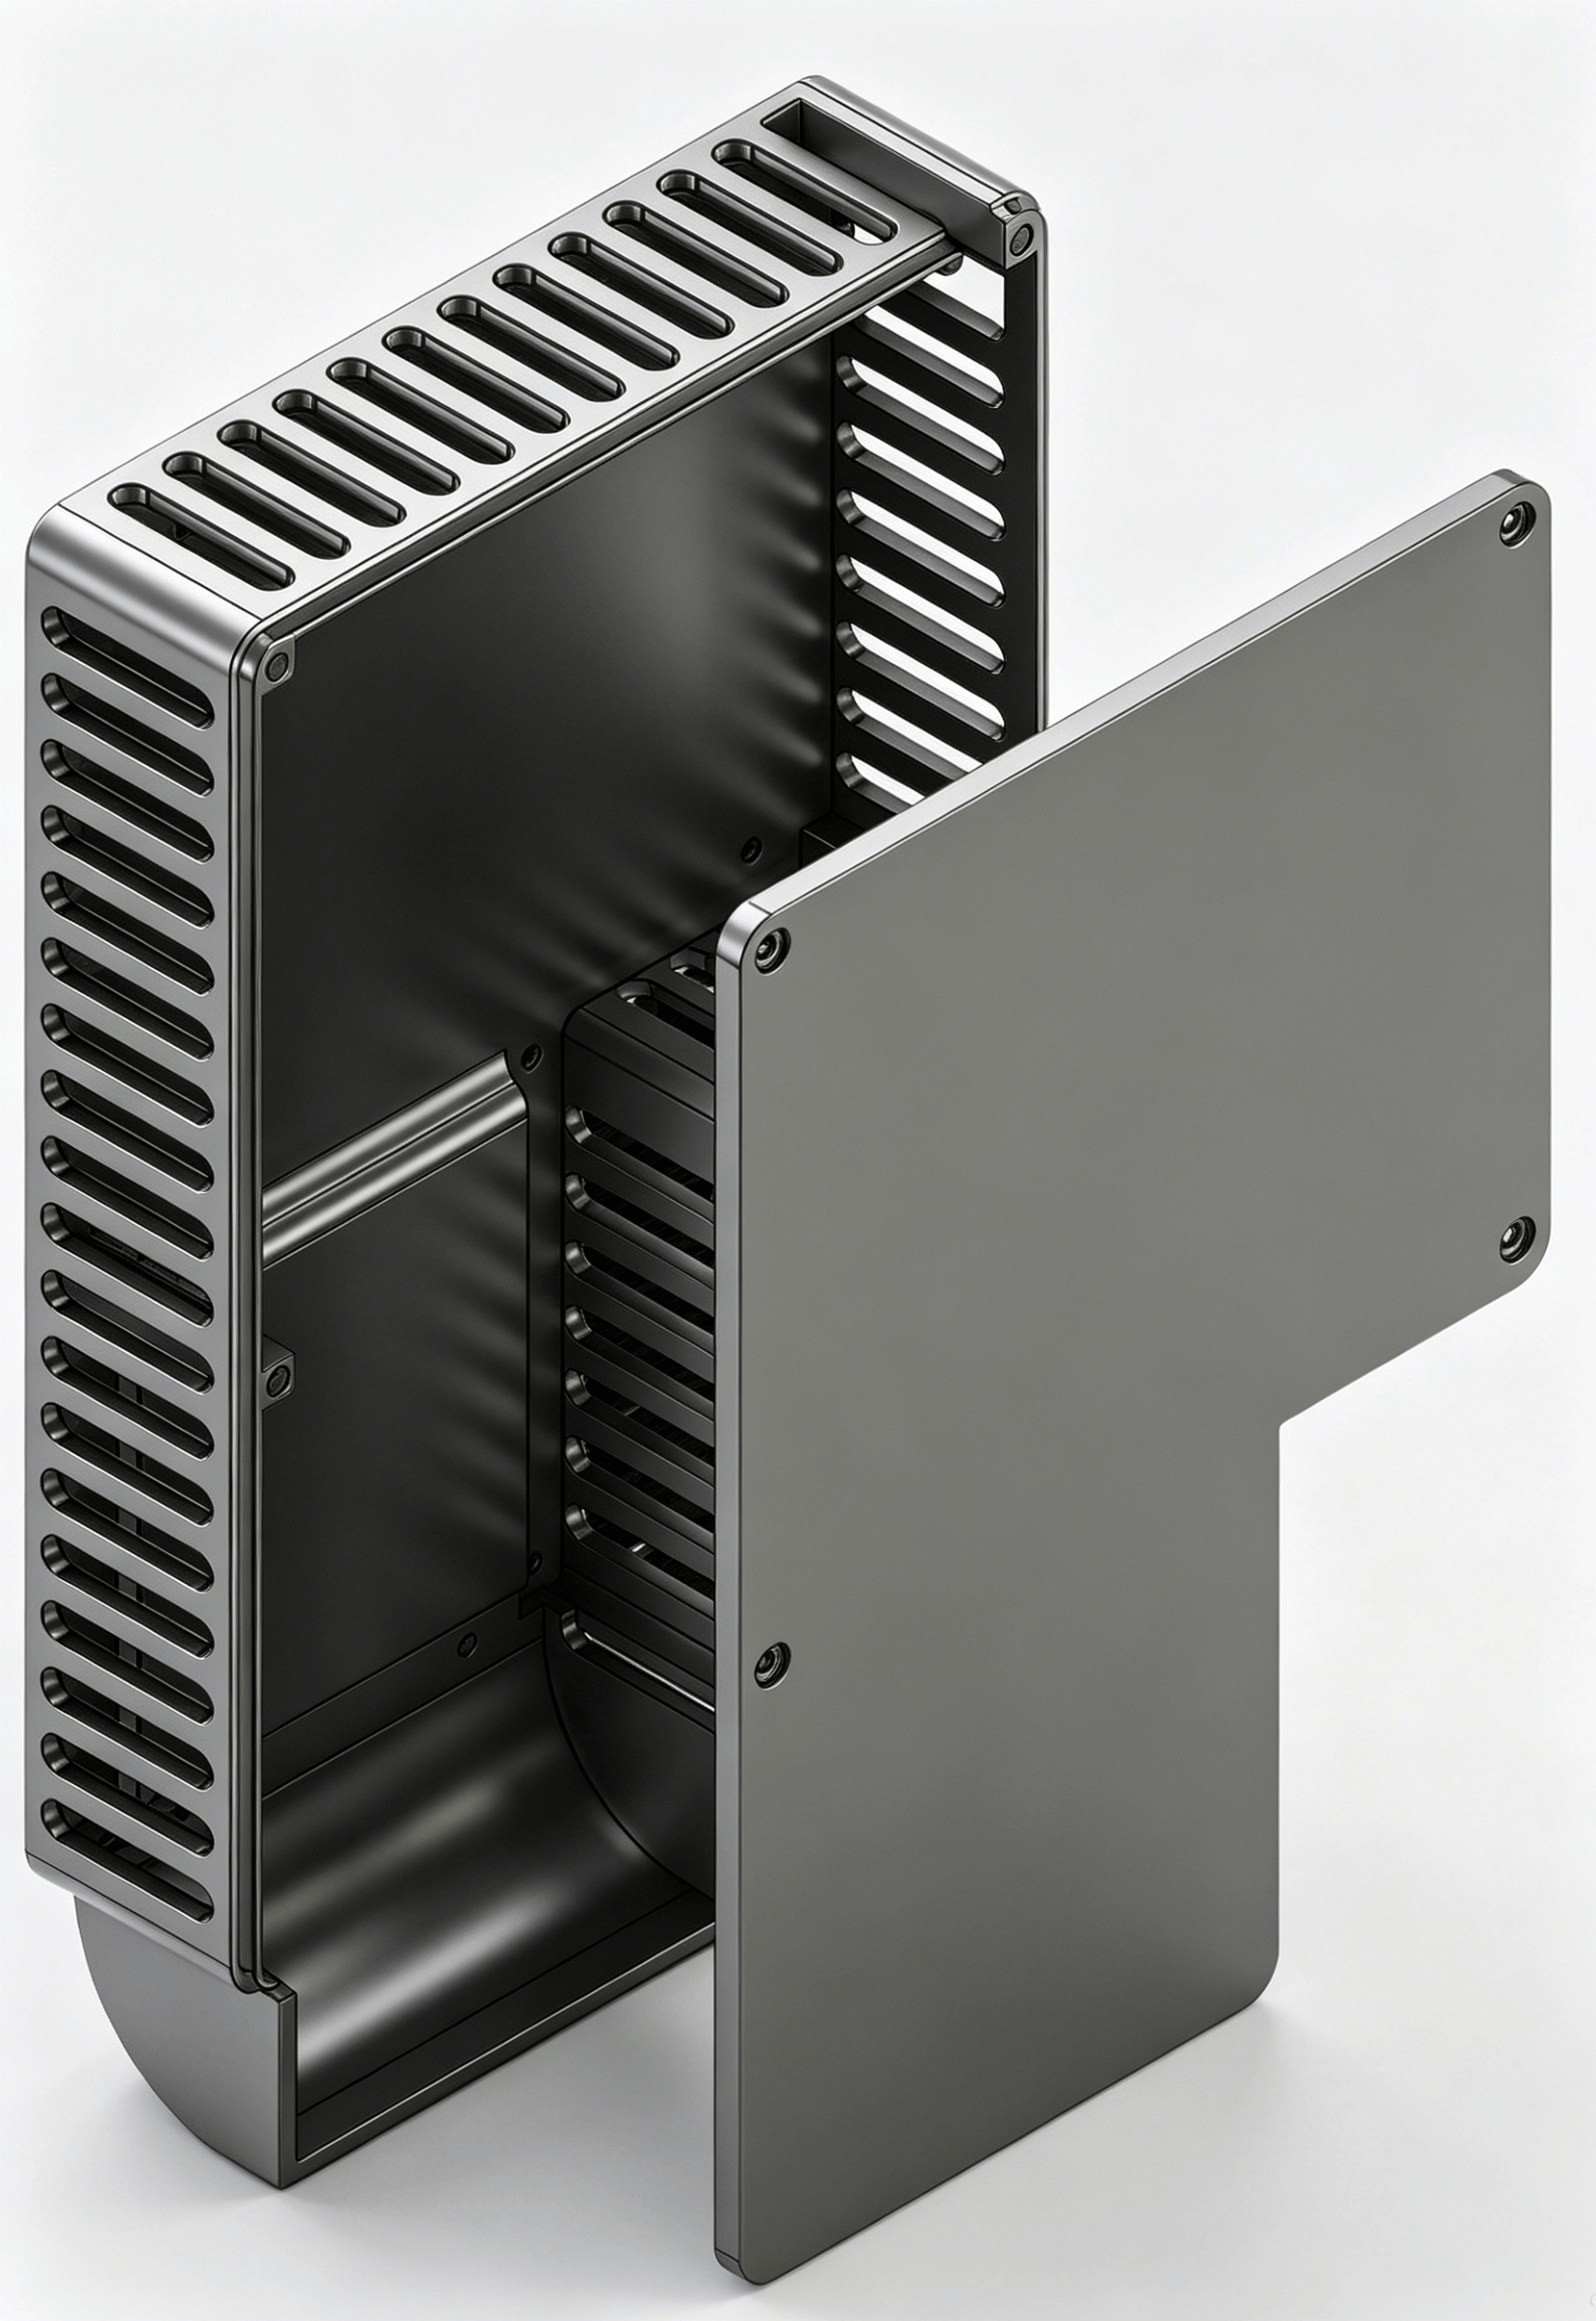
With the same enclosure thickness, the fan intake clearance has been significantly increased from 2 mm to 10 mm, resulting in several times higher airflow. In V1, due to insufficient airflow, the heater plate temperature could easily reach 150 °C. In V2, it can now be effectively kept below 100 °C.
The heater plate is now mounted using nylon standoffs for thermal isolation. Nylon standoffs are heat-resistant, so even when using a PETG enclosure, heating performance and speed are no longer affected.
An airflow guide (duct) has been added. Instead of hot air blowing directly downward as in V1, the airflow is now redirected to exit from the side, improving heat distribution.
Conclusion: Compared to V1, airflow is increased by several times, heating speed is significantly improved, and the enclosure is much less likely to soften due to heat. PETG is now sufficient to fully utilize 24V 10A heating performance.
Measured Performance
PETG enclosure, with heating current set to 12A and heater protection temperature set to 100 °C.
After heating starts:
- Current stabilizes at 9–10A
- Chamber temperature increases by ~0.1 °C every ~3 seconds (V1 was only 3–4A)
The temperature at the connection point between the heater plate and enclosure is only around 50 °C, which does not cause PETG softening.
Since V2 uses nylon standoffs to connect the heater plate and enclosure, and nylon is heat-resistant with limited heat transfer, the enclosure will not soften even if the heater plate temperature is high.
Recommended Heater Protection Settings
- PETG: 100 °C
- ABS: 130 °C
- PA6-CF: 150 °C (maximum)
Additional Materials for V2
| Name | Qty | Specification | Notes | Link |
|---|---|---|---|---|
| Screw | 3 | Phillips flat-head screw M3 × 10 | Any length ≥ 10 mm is acceptable | Taobao |
| Nylon Standoff | 4 | M3 × 6 + 6 | Hex, single-ended | Taobao |
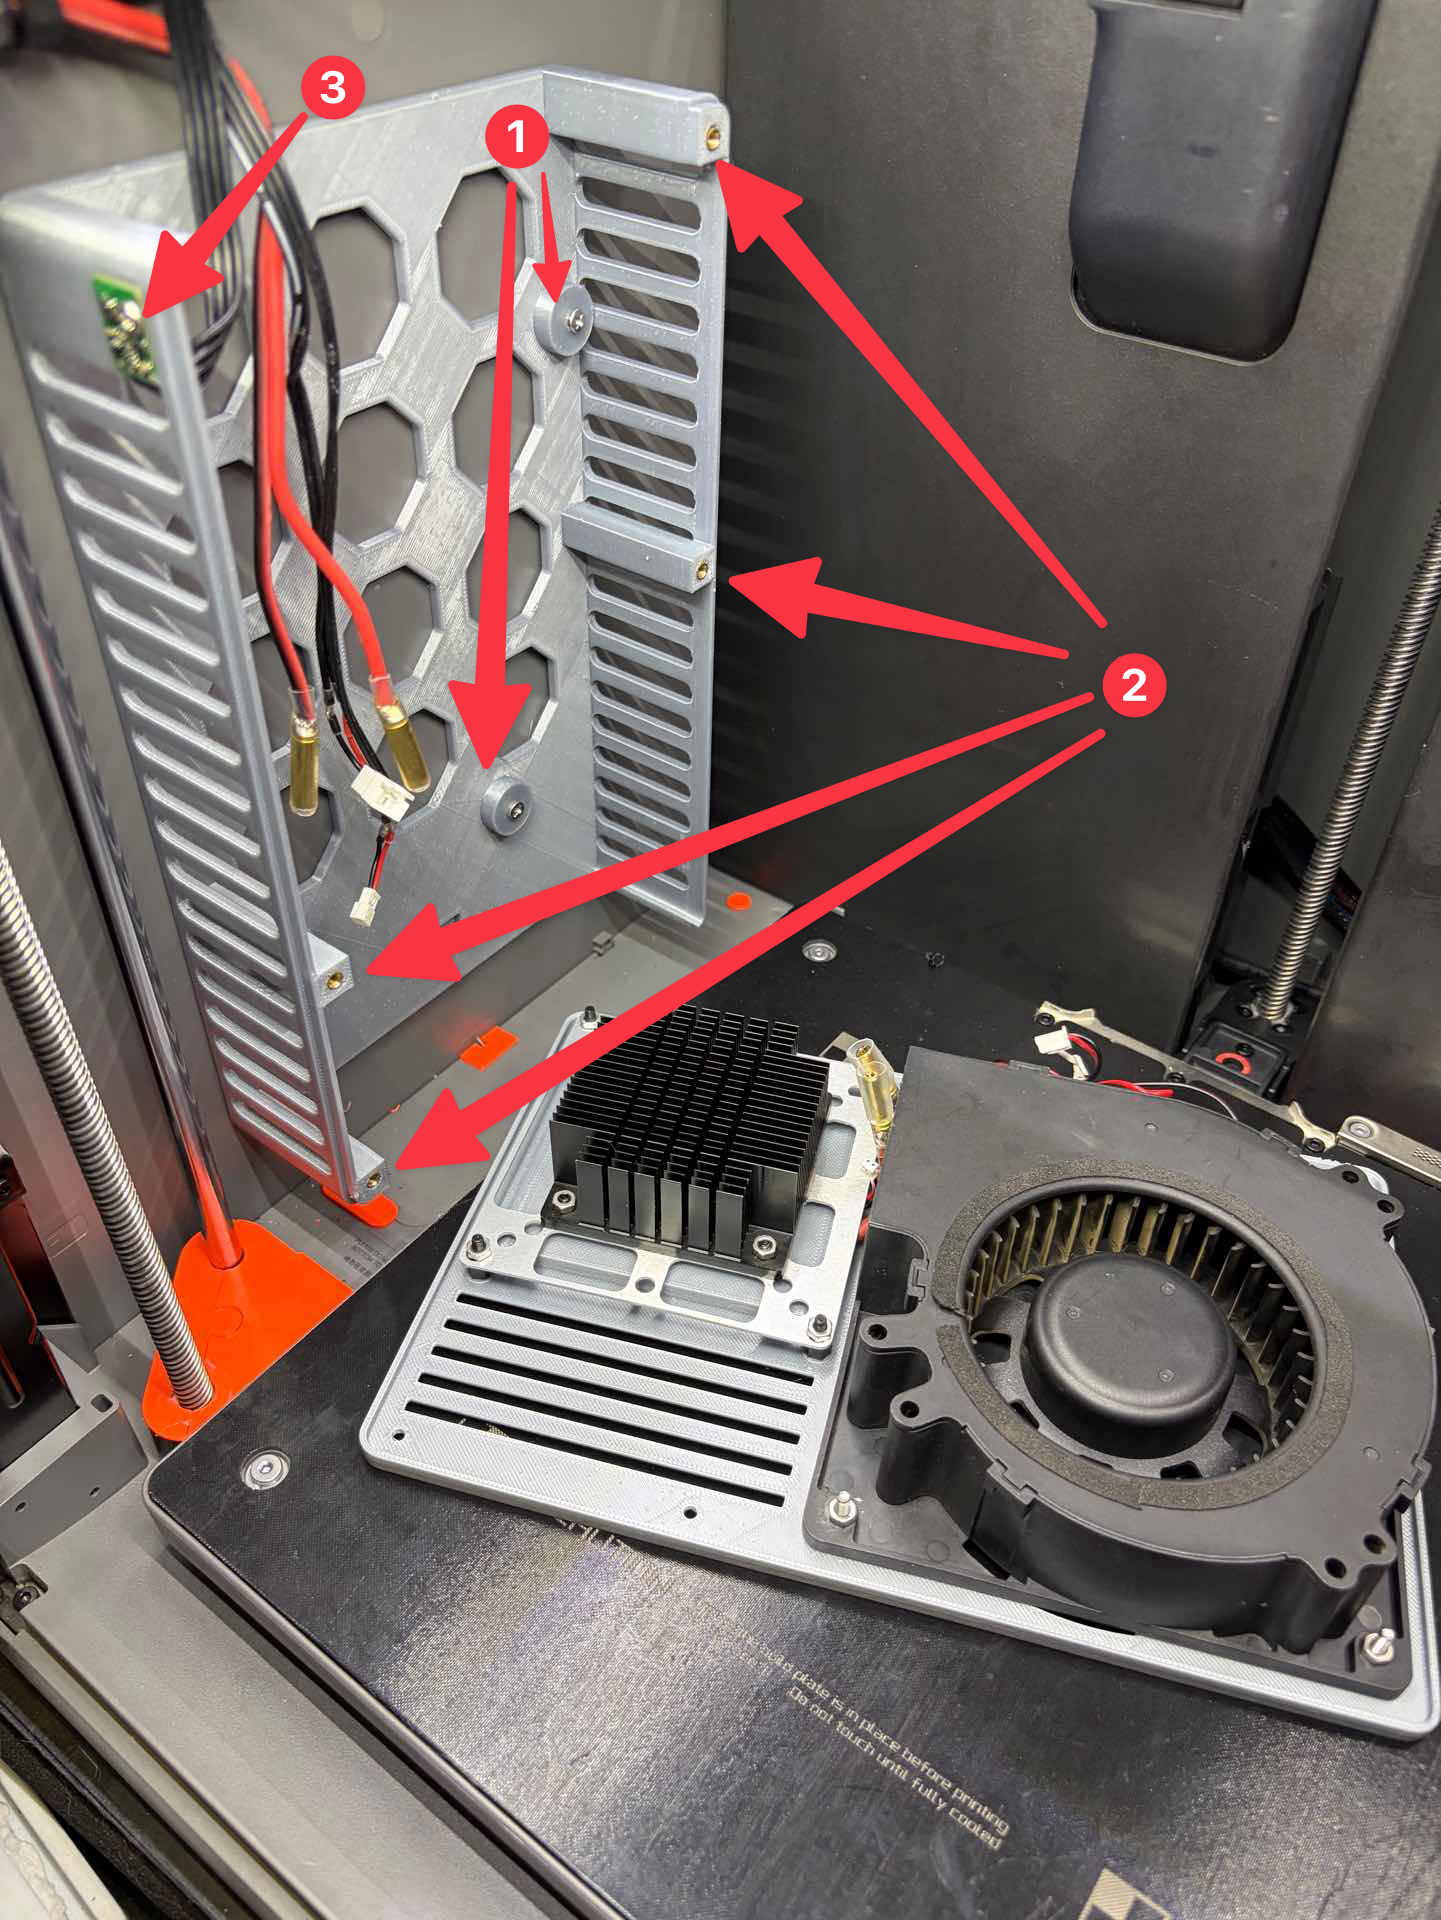
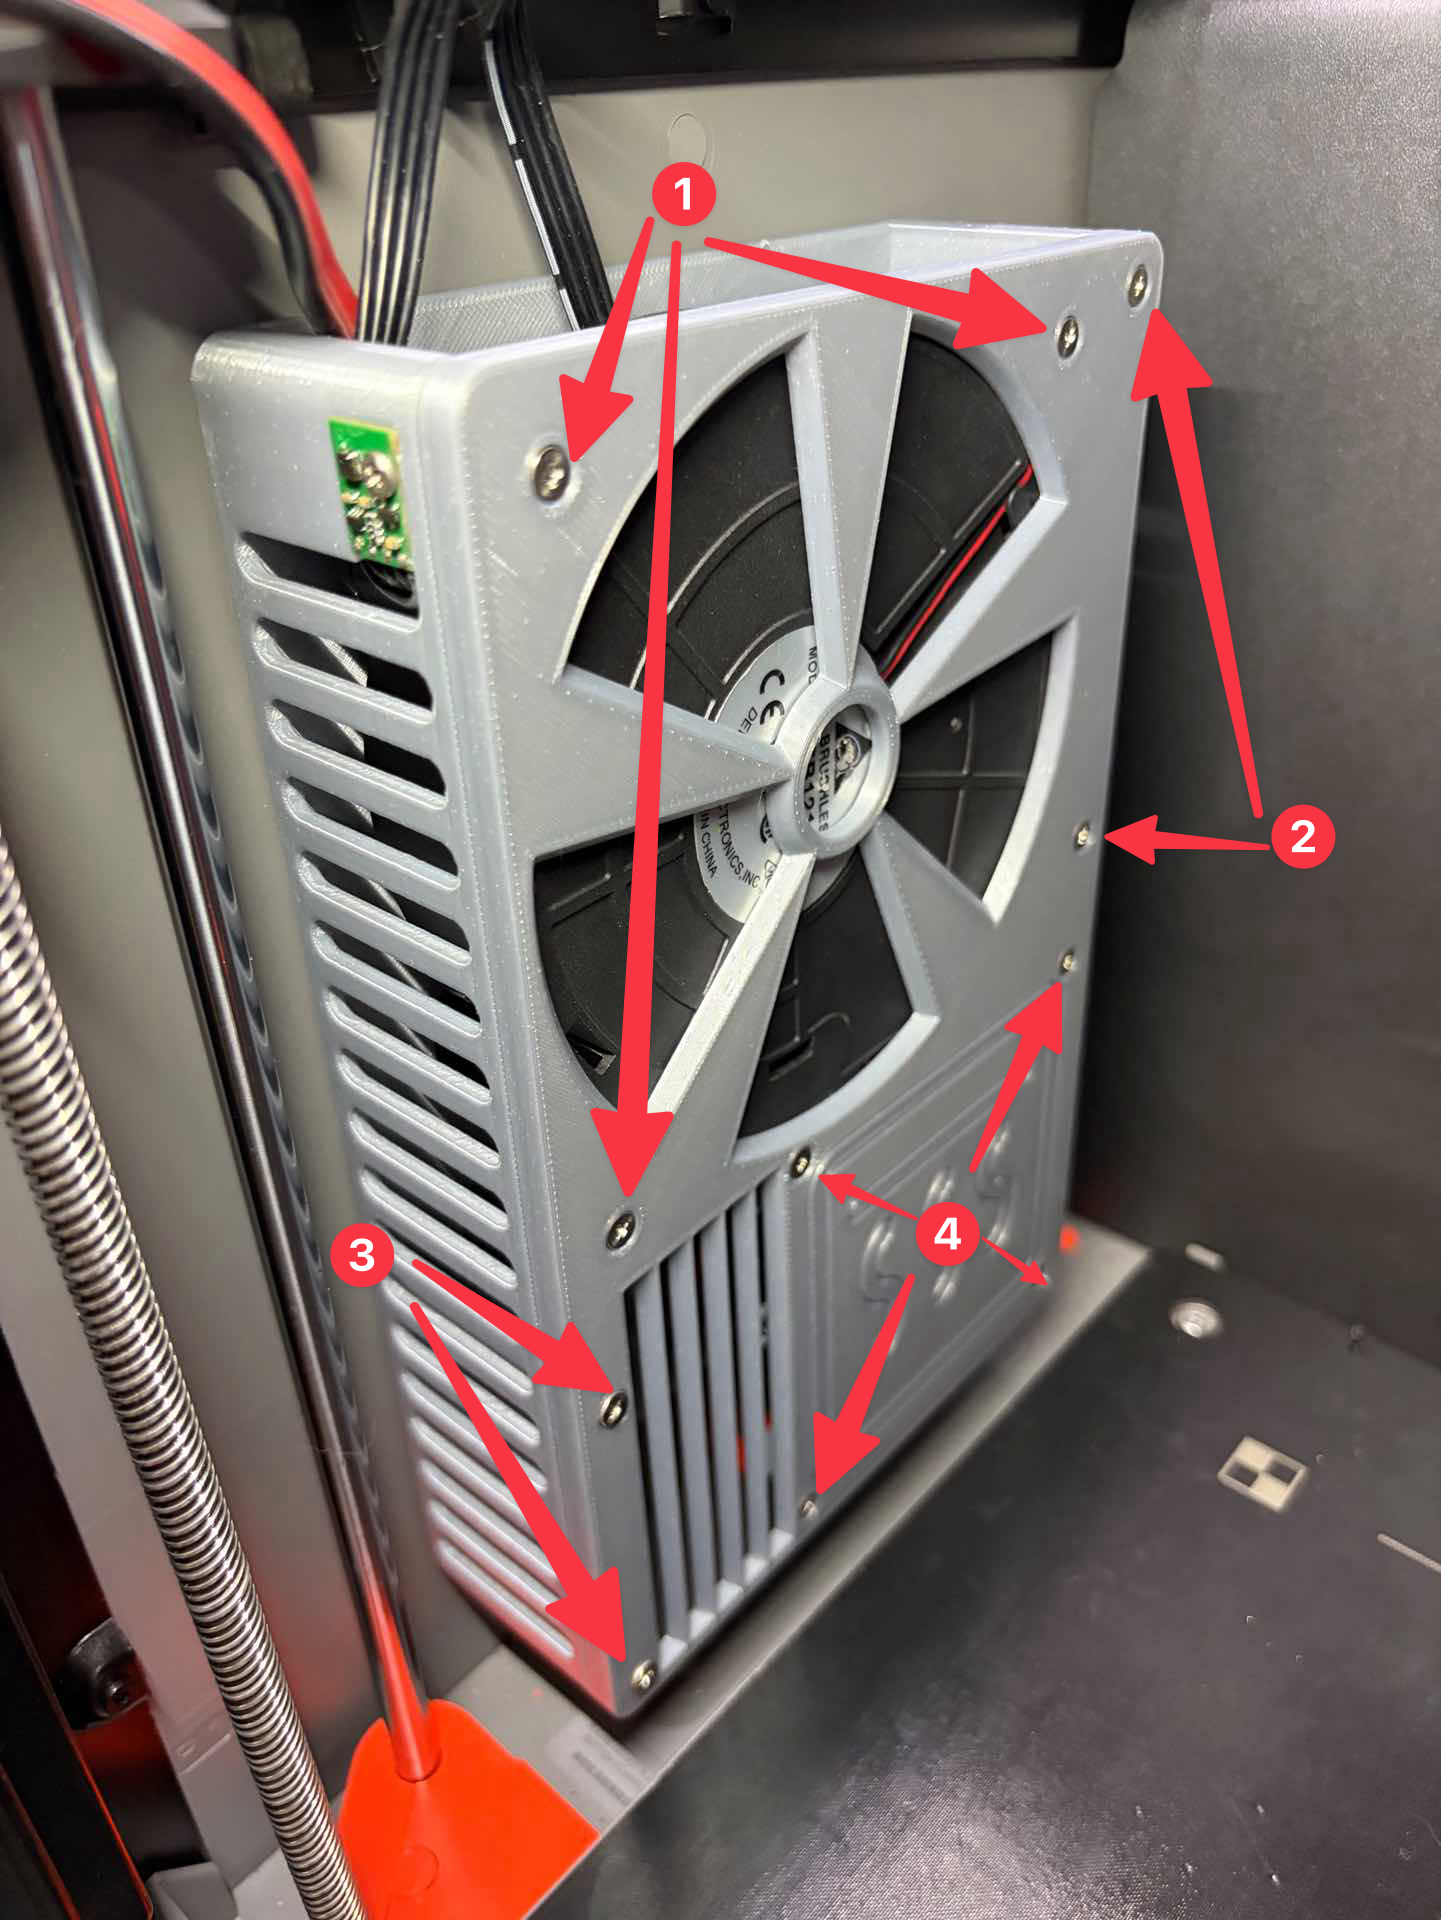
P2S Heater Module
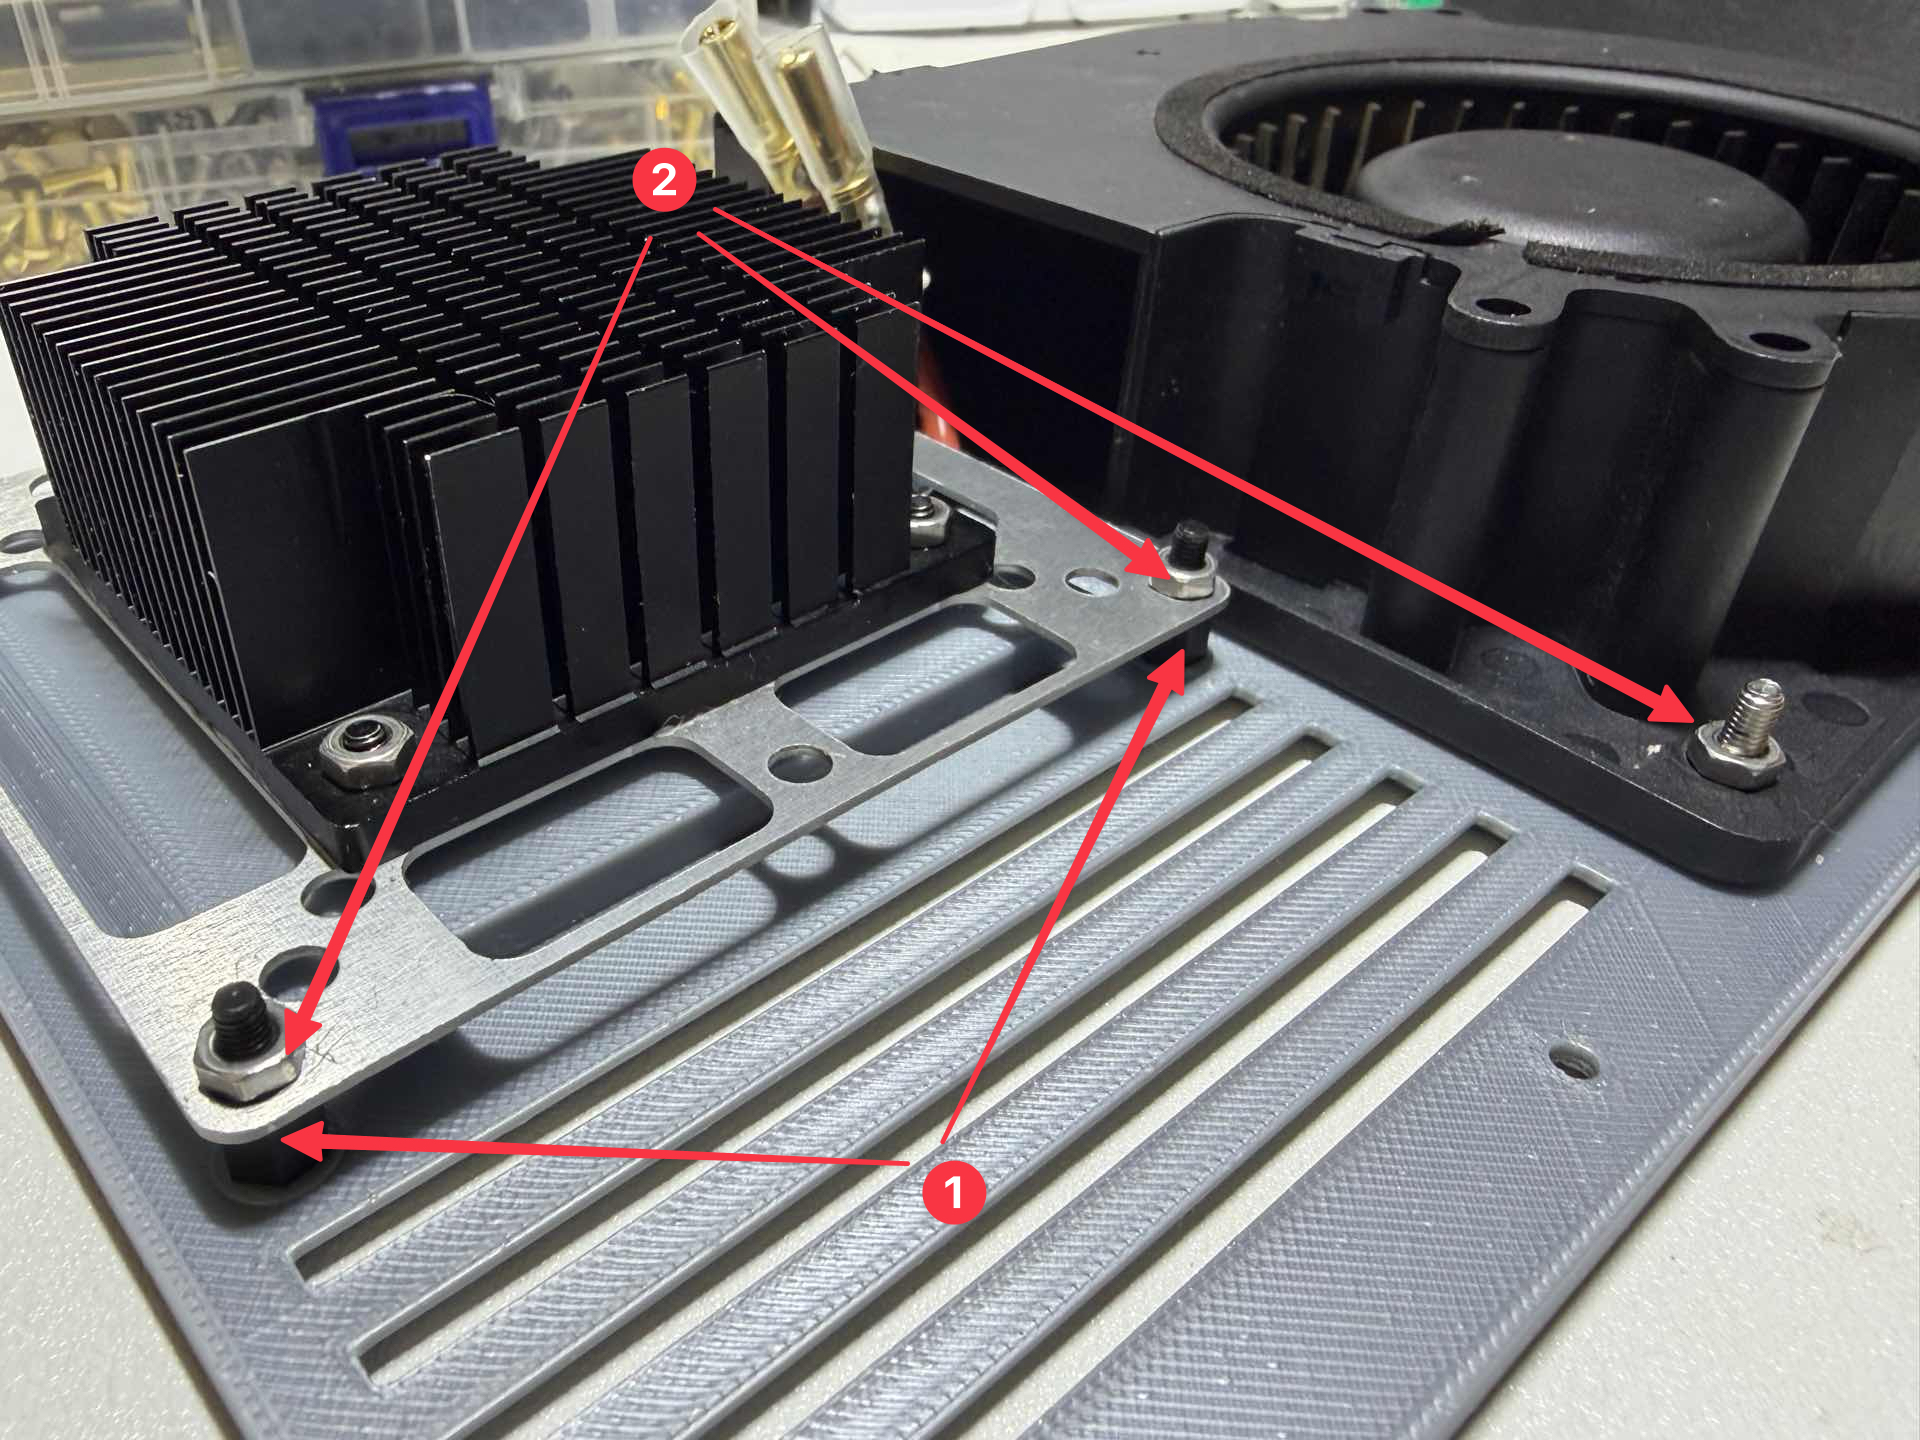
- Hex single-ended nylon standoff M3 × 6 + 6
- M3 nut
- Phillips flat-head screw M3 × 6 + M3 nut (Insert the screw from the back side and fasten the nut on the front side)
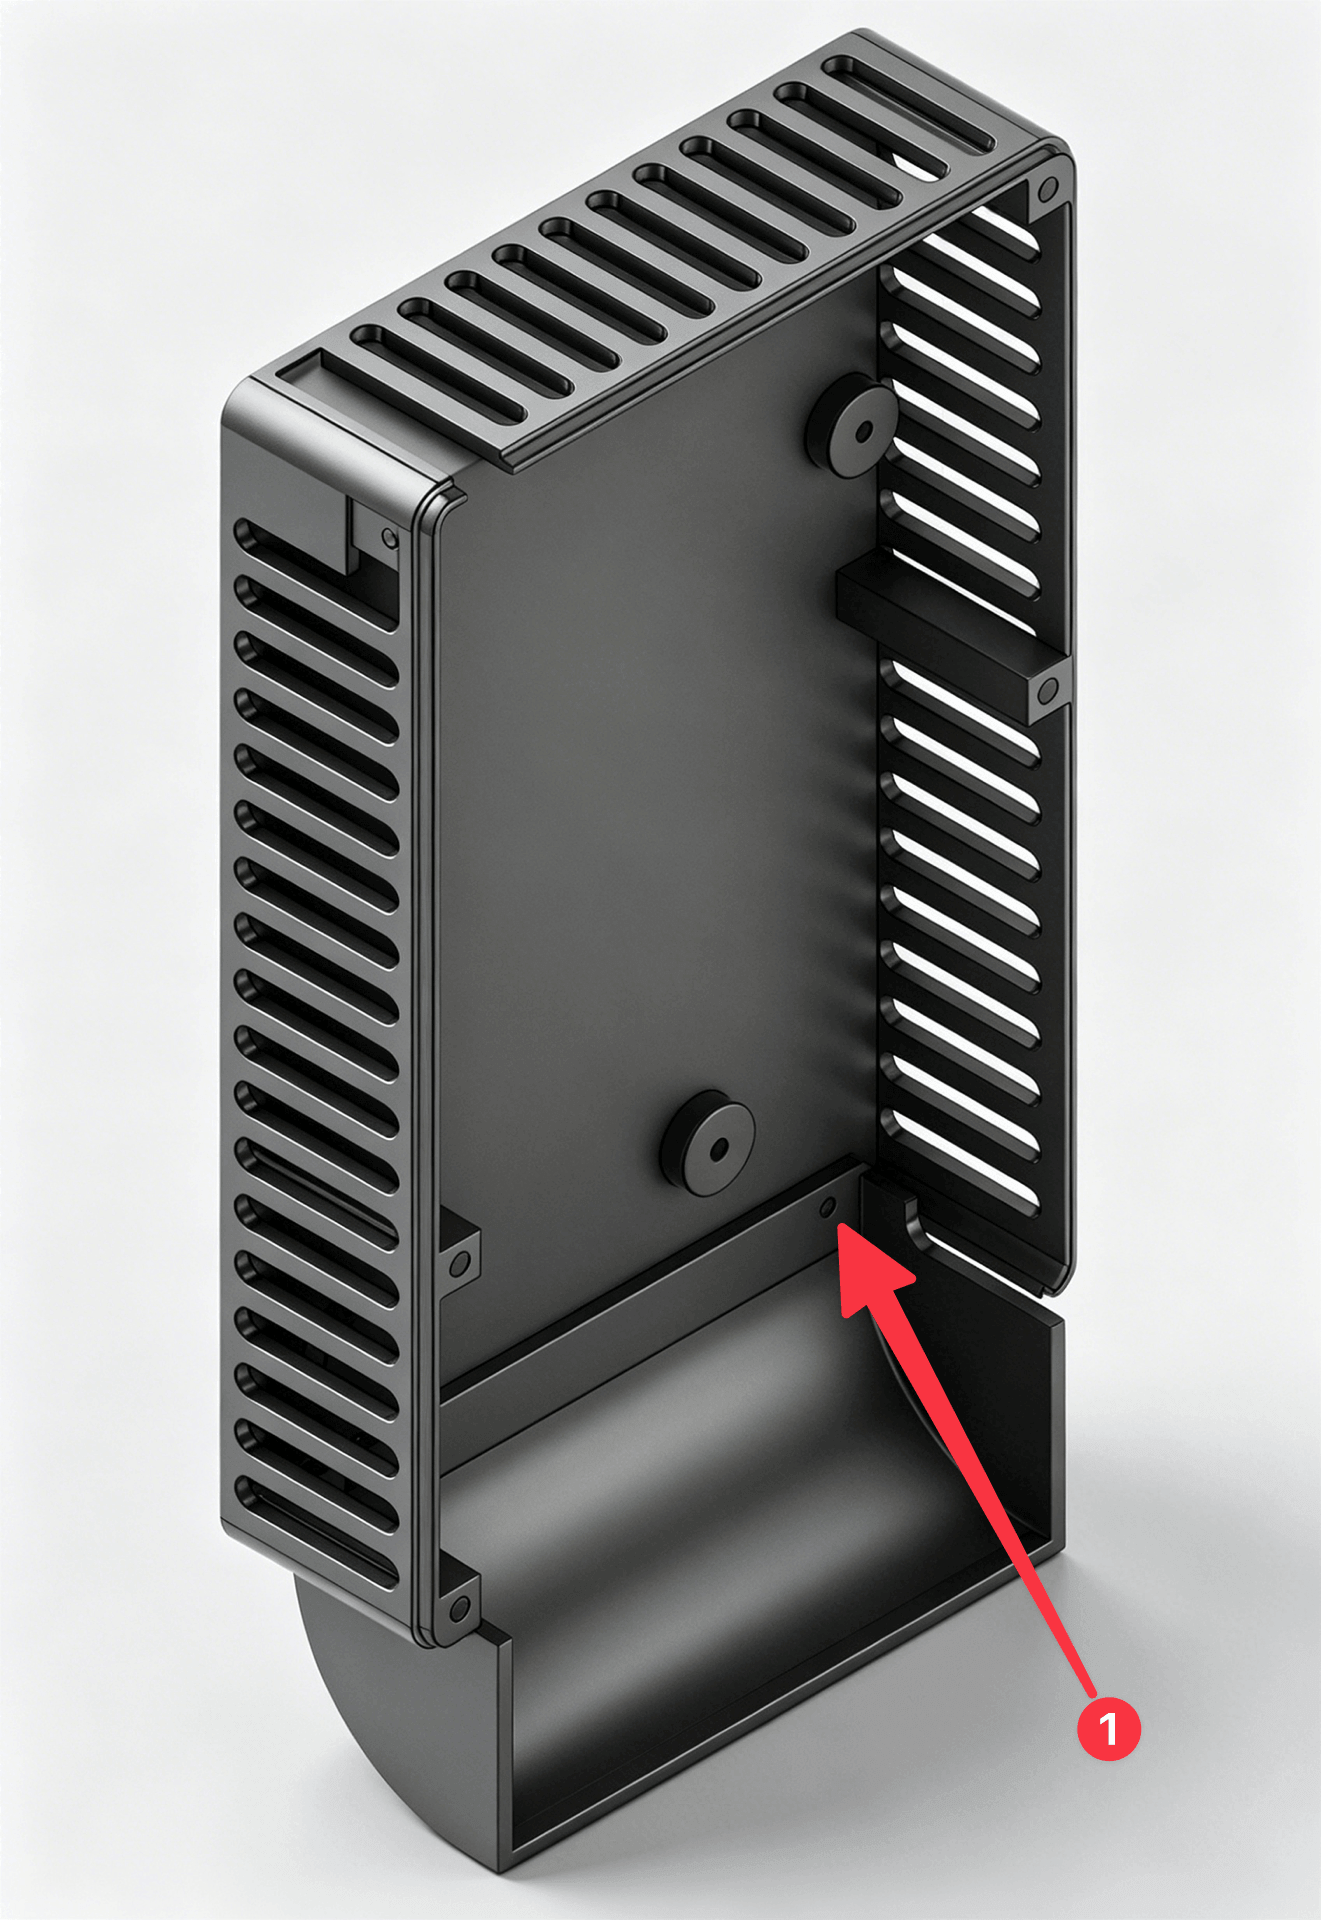
- Flat self-tapping screw M3 × 6 (mounts inside the left side of the P2S enclosure)
- Heat-set insert M3 × 5 × 4.2
- Phillips flat-head screw M3 × 6 + M3 nut (for fixing the AHT20 sensor)
- Phillips flat-head screw M3 × 10
- Phillips flat-head screw M3 × 6
- Phillips flat-head screw M3 × 6
- Phillips flat-head screw M3 × 6
P1S Heater Module
The installation principle is similar to P2S, and the screw specifications are the same. Please refer to the P2S instructions and adapt accordingly.
For P2S, the fan and heater plate mounting screws are located on the top side, while for P1S they are located on the back side. After installation, secure the module to the right side inside the enclosure using 3M double-sided tape.