Firmware Flashing
Important Notes
- During flashing, connect the main control board to your computer using a USB-C data cable.
- During flashing, disconnect the 24V power input from the main control board. Otherwise, unexpected behavior may occur.
- For the first-time flashing, you must erase the Flash using the corresponding tool. Otherwise, flashing may fail.
- When updating to a newer firmware version, do not erase Flash again, or your custom configuration data will be lost.
Pre-Flash Checklist
- Ensure the USB-C cable is a data cable, not power-only.
- Power off 24V and keep USB power only.
- Extract the firmware archive and prepare the three
.binfiles.
Method 1: Flash Using Flash Download Tool (Windows)
Download the Flash Download Tool: https://www.espressif.com/zh-hans/support/download/other-tools
Launch the tool and select the following parameters:
ChipType:ESP32-S3WorkMode:DevelopLoadMode:USB.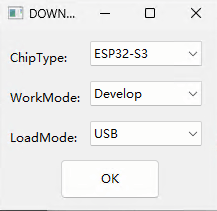
Configure firmware addresses:
File Address C:\XXX\SmartChamber-3D.bootloader.bin 0x0 C:\XXX\SmartChamber-3D.partitions.bin 0x8000 C:\XXX\SmartChamber-3D.ino.bin 0x10000 Configure additional parameters:
SPI SPEED:80MHzSPI MODE:QIODoNotChgBin:yes.
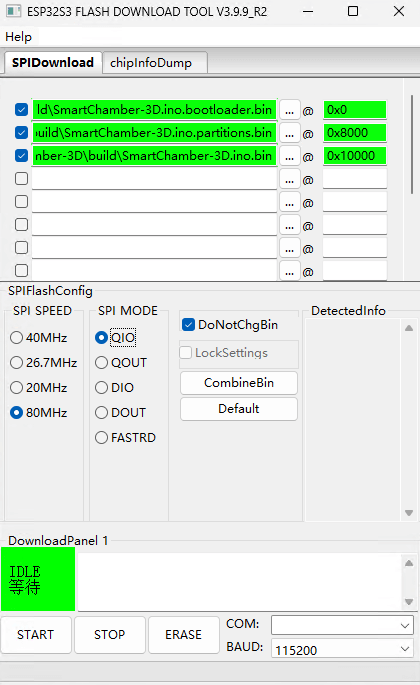
If this is your first time flashing, click
Eraseand wait for Flash erase to complete.Connect the main control board using a USB-C cable, then select the corresponding serial port under
COM. If no serial port appears, please check for hardware issues such as board damage.Click
STARTand wait for flashing to complete.
Method 2: Flash Using ESP Launchpad (Web)
Open the web page: https://espressif.github.io/esp-launchpad/
Click
Connectand select the corresponding serial port.
If this is your first time flashing, click
Erase Flashand wait for completion.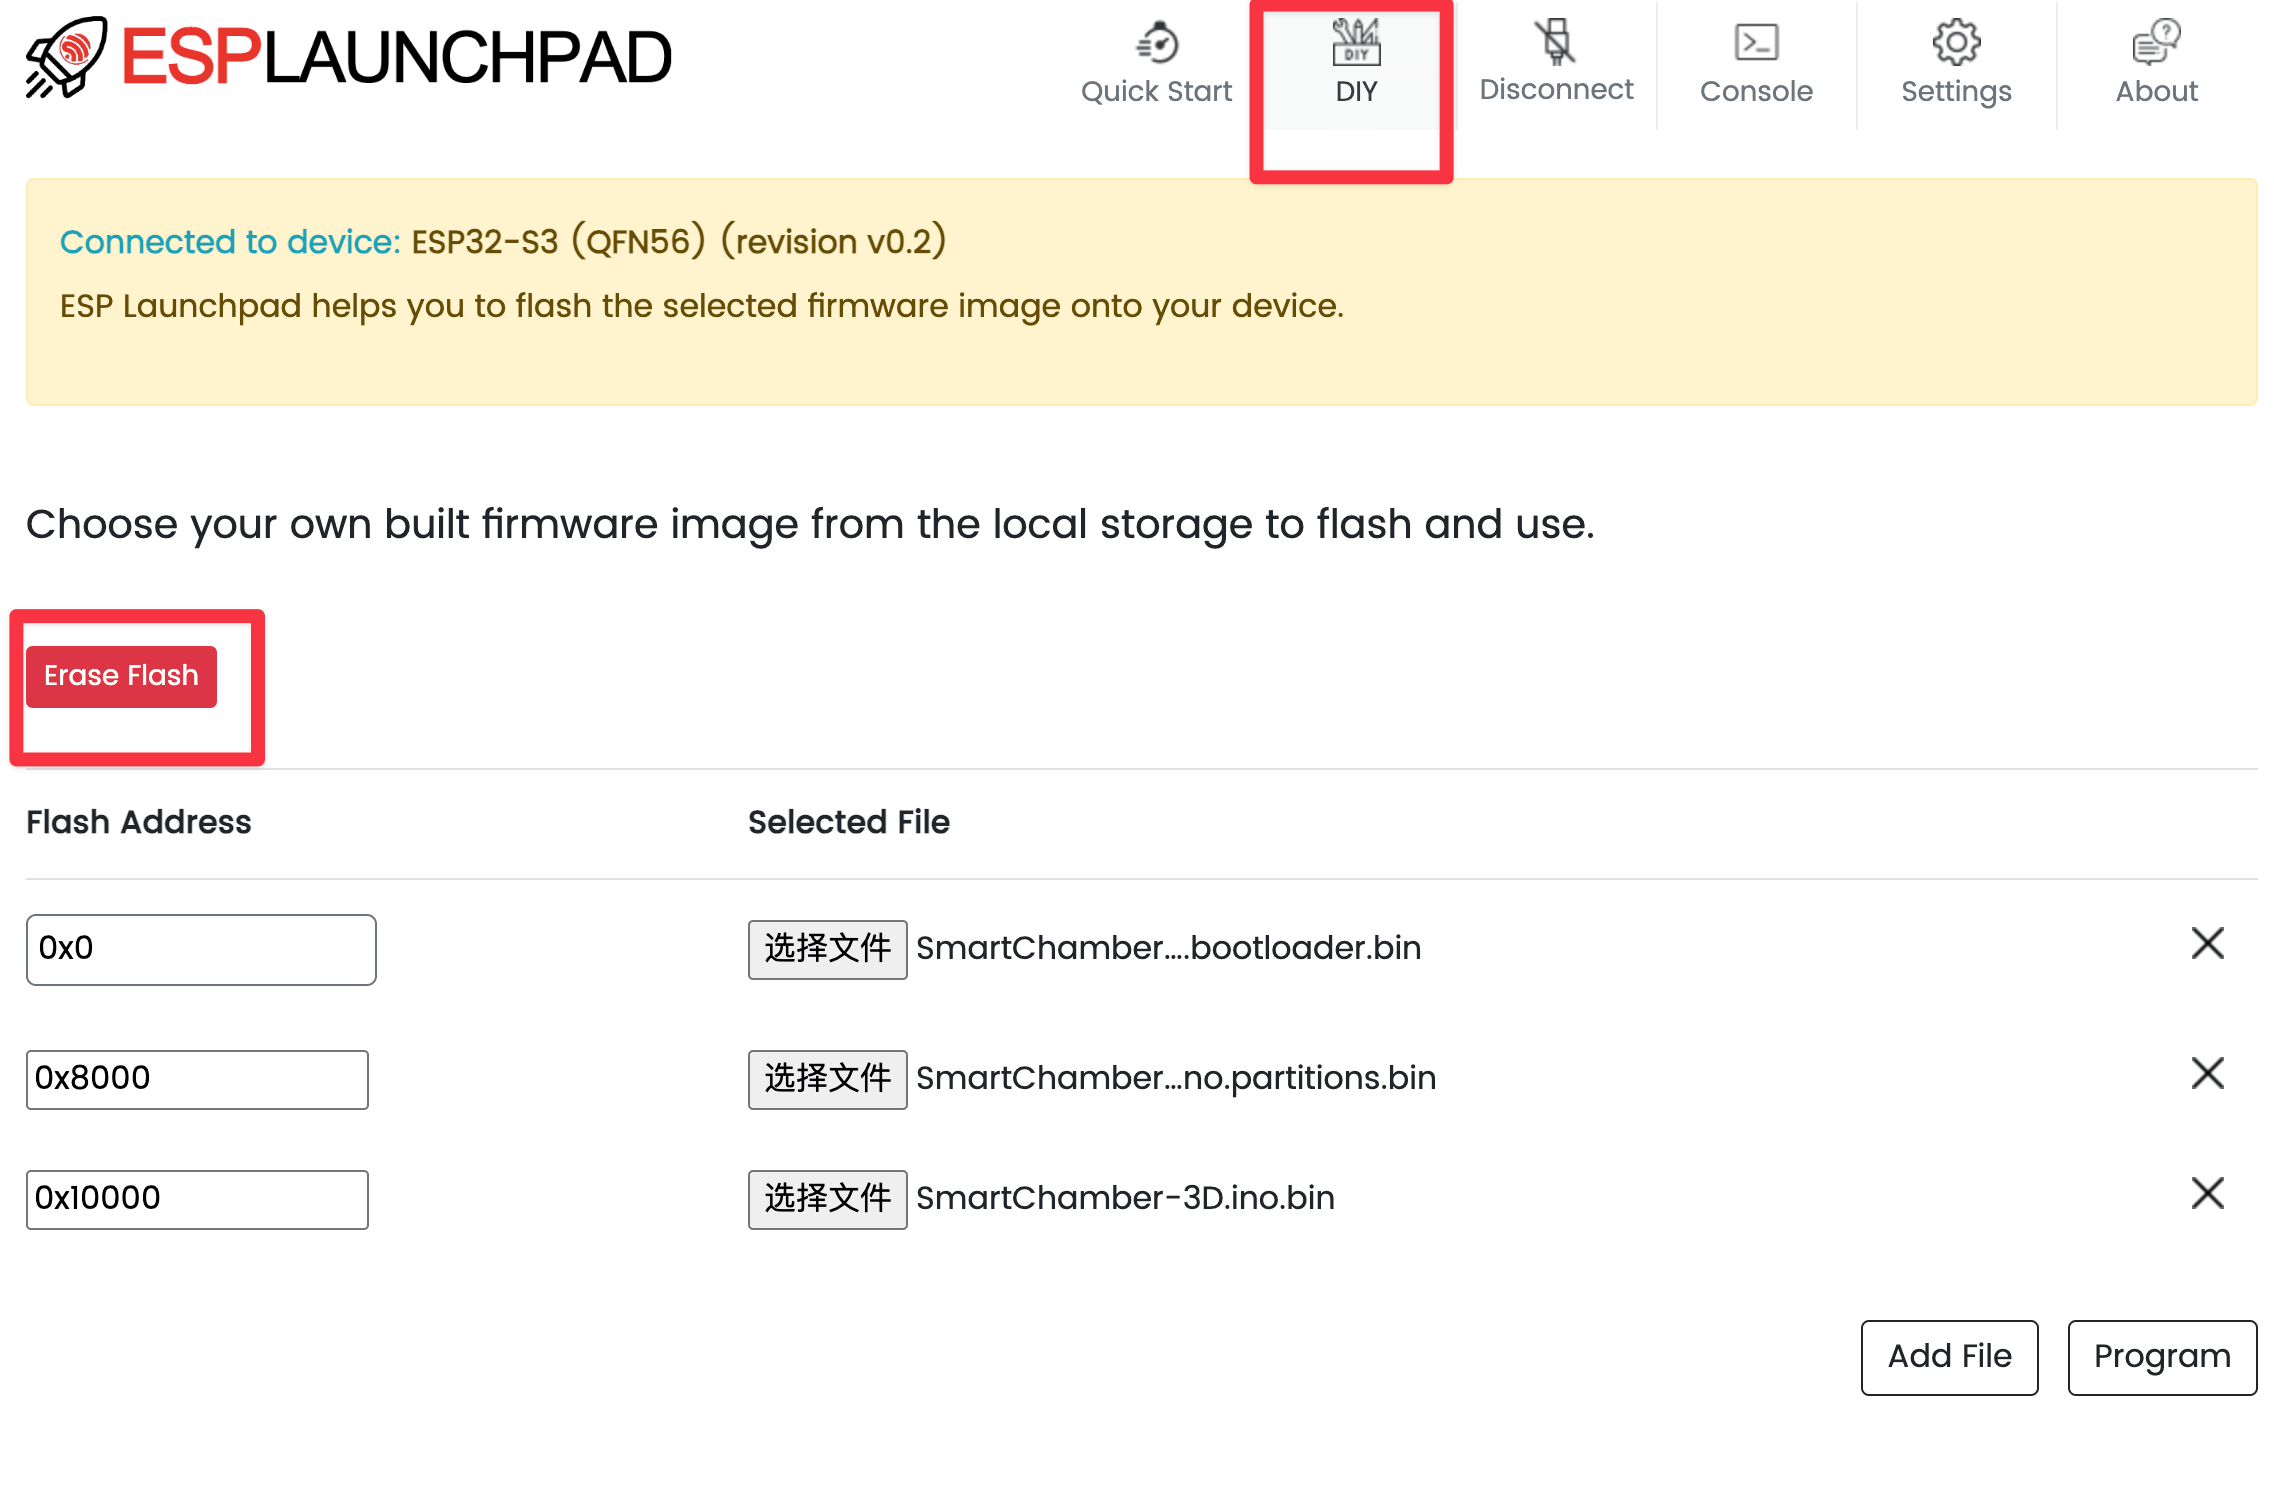
Configure firmware addresses:
File Address C:\XXX\SmartChamber-3D.bootloader.bin 0x0 C:\XXX\SmartChamber-3D.partitions.bin 0x8000 C:\XXX\SmartChamber-3D.ino.bin 0x10000 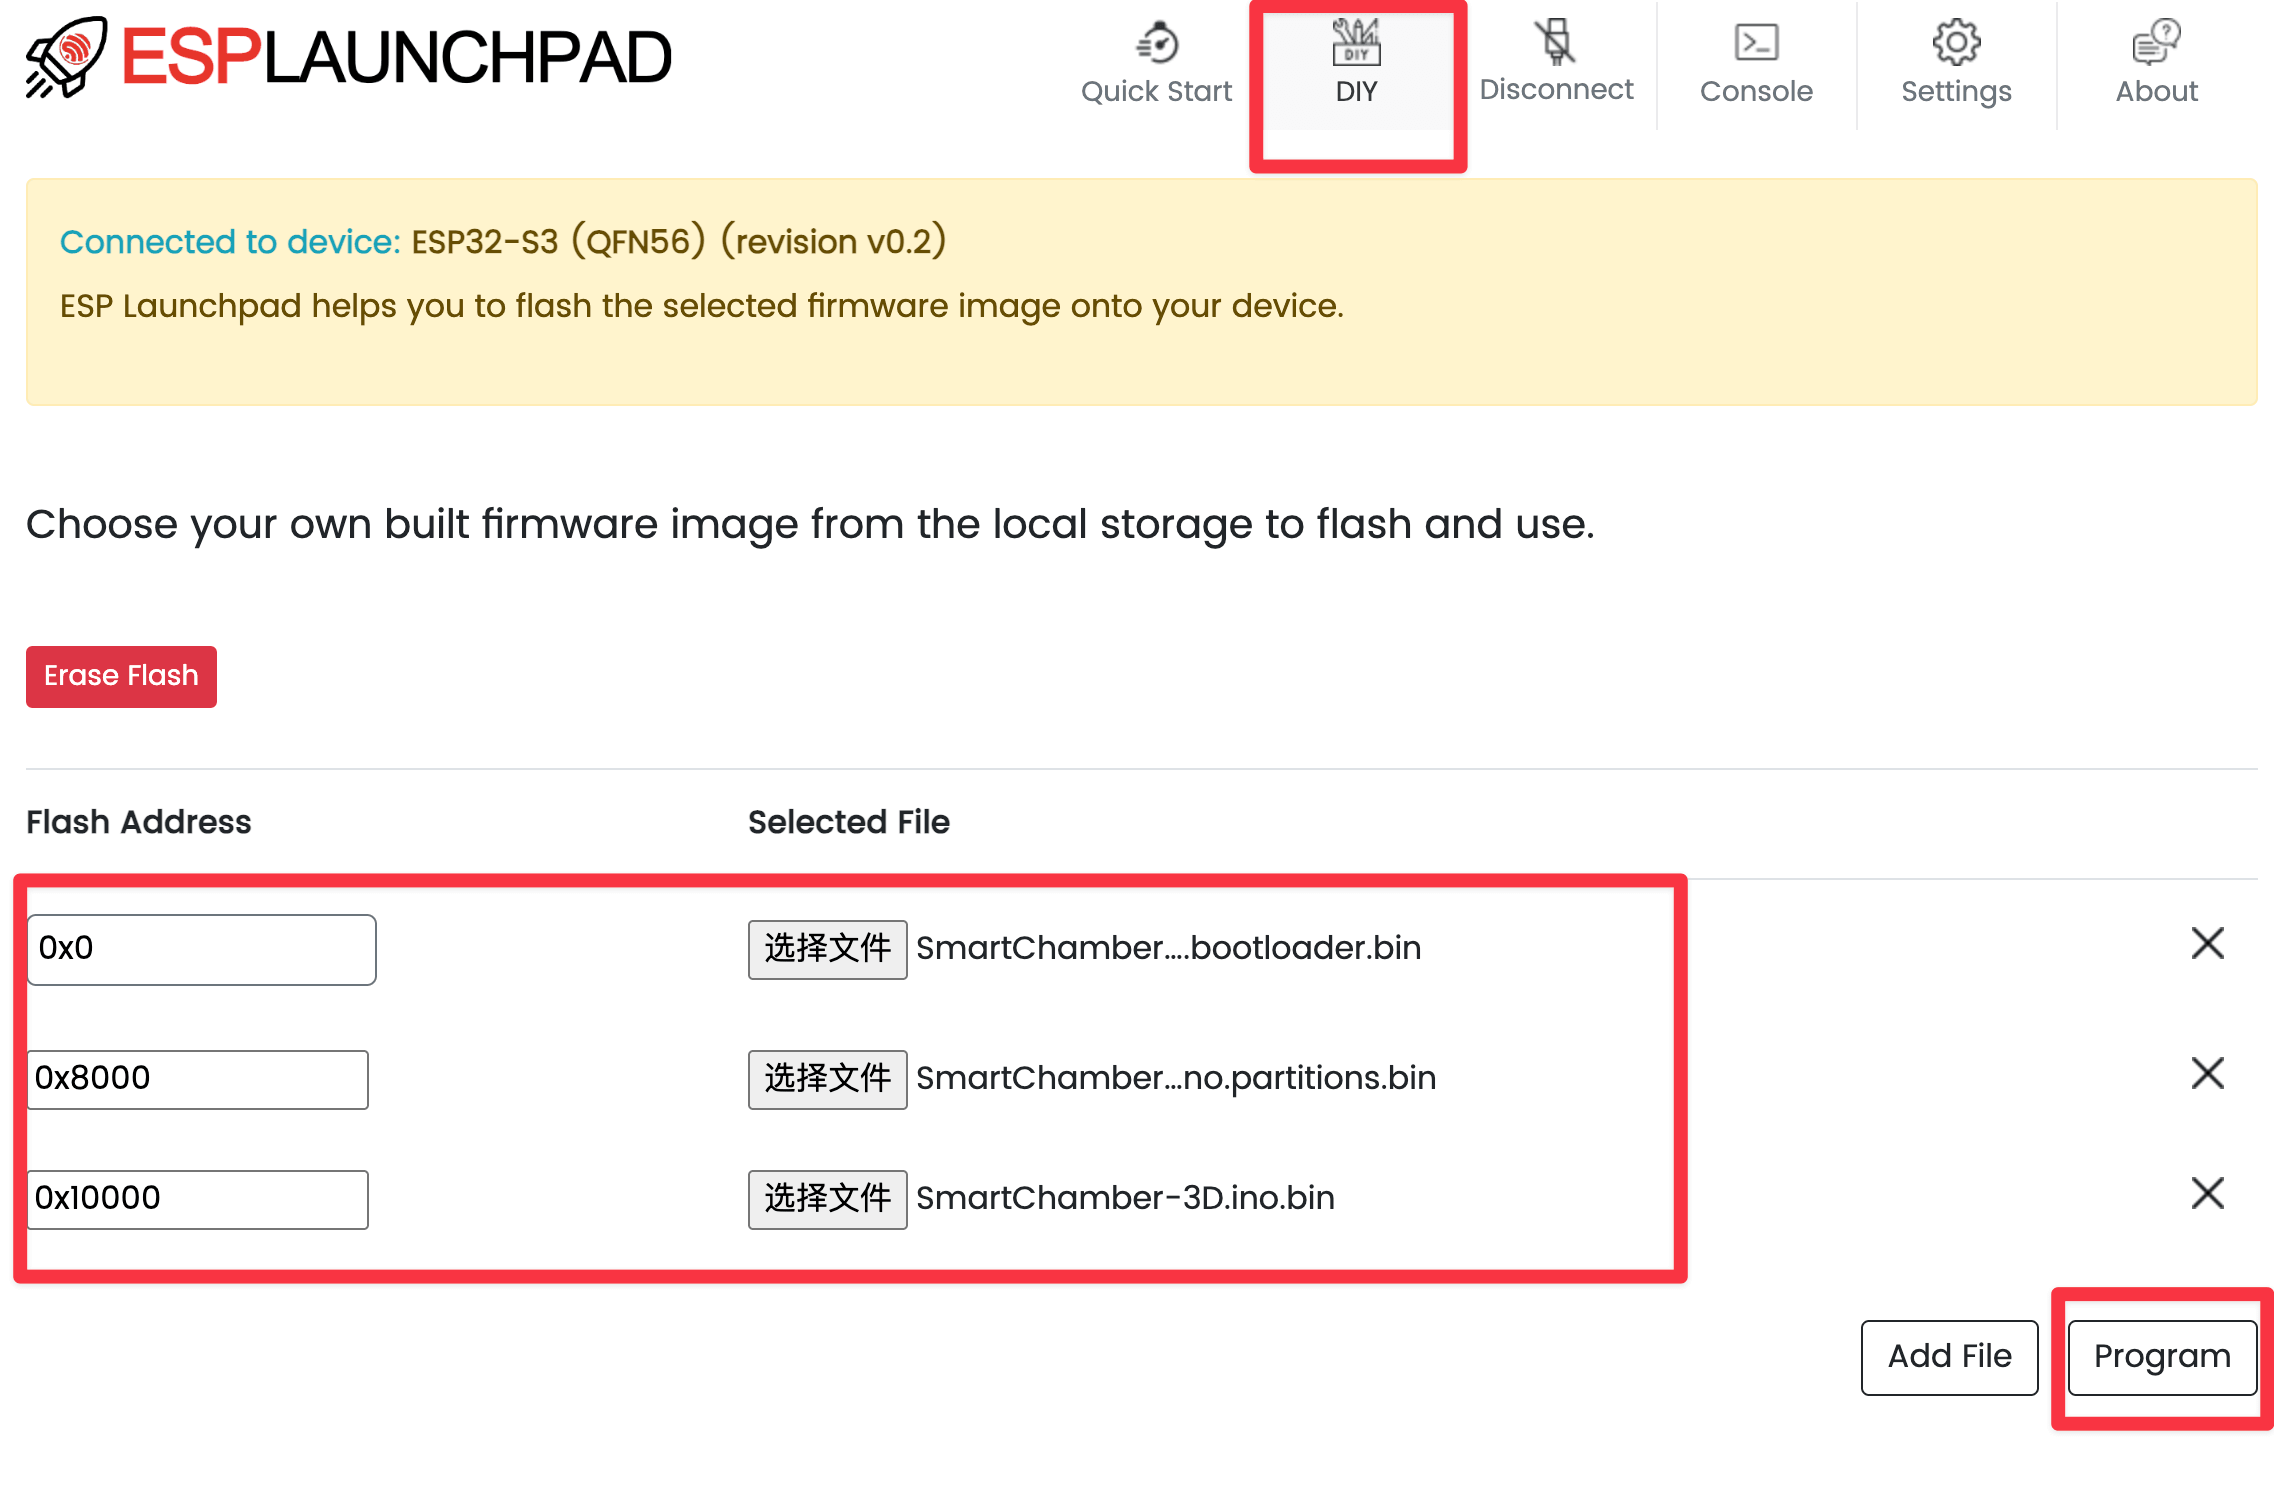
Click
Programand wait for flashing to complete.
Troubleshooting
- No serial port: try another USB cable or USB port.
- Flashing fails: confirm whether
Eraseis required for the first flash. - Screen has no display: power with USB only and check the screen cable.