Function Description
Main Screen
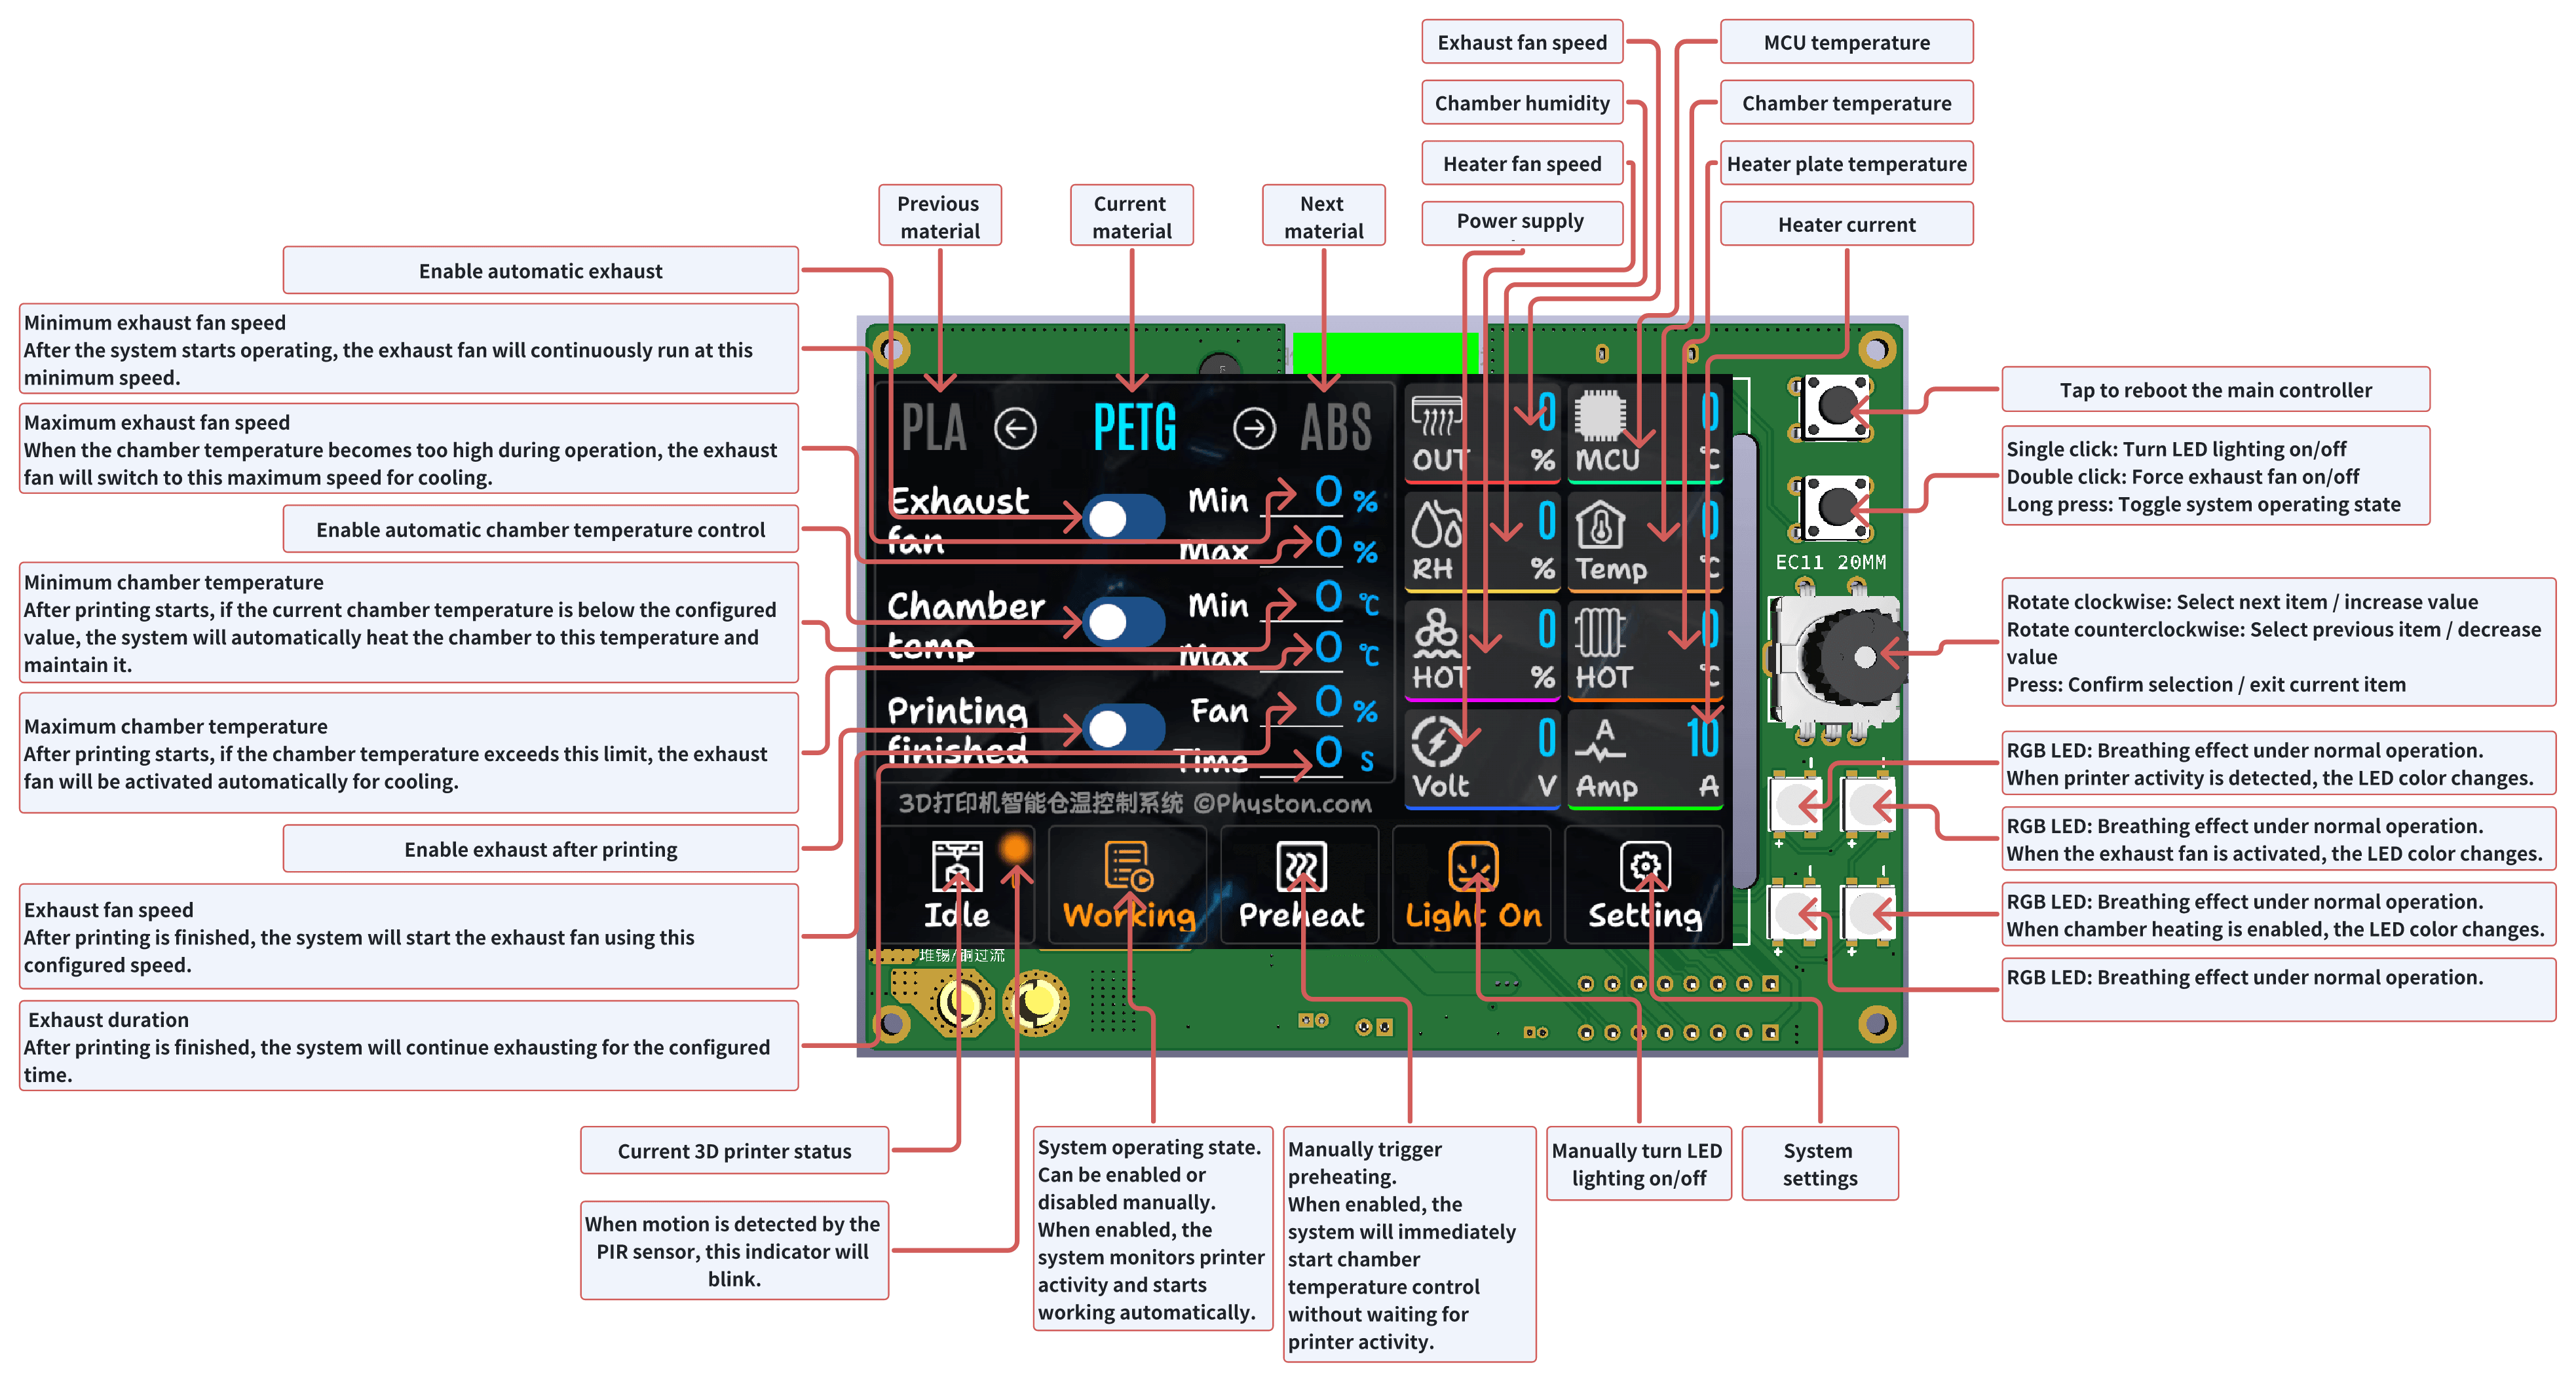
The main screen is used for daily operation. Typically you only need to switch materials here and check chamber temperature and system status.
- Current chamber temperature and target temperature: used to confirm whether the material requirements are met.
- Material profile: after switching, the system automatically loads the profile parameters.
- Fan and heater status: used to confirm the system is working.
- Working button: puts the system into a ready state and starts monitoring printer activity.
Settings Page
- System Language: Switch the system language. Currently supports Chinese and English.
- Beep on Keypress: Enable or disable keypress sound.
- Screen Brightness: Adjust screen brightness.
- Screen Off Timeout: Set the number of seconds before the screen turns off. This only turns off the display and does not affect system operation.
- Keep Screen On During Printing: Keep the screen always on while the 3D printer is operating (no screen sleep).
- EC11 Encoder Direction: Select the rotation direction of the EC11 encoder. Choose Normal or Reverse according to your encoder model.
- PIR Trigger Delay: The system uses the PIR motion sensor to detect printer activity. If motion is continuously detected for n seconds, chamber temperature control will be activated.
- PIR Off Delay: If no motion is detected by the PIR sensor for n seconds, the system assumes the printer has stopped and disables chamber temperature control. (The system default time is 50s. If you often print multi-color models, due to the long color change time, it is recommended to set it to 90s.)
- Light On After PIR Detection: Automatically turn on the LED lighting when printer activity is detected.
- Light Off After PIR Timeout: Automatically turn off the LED lighting when the printer is detected as stopped.
- Beep on PIR Detection: Audible beep when printer activity is detected.
- Beep on PIR Timeout: Audible beep when the printer is detected as stopped.
- Heater Current Limit: Set the maximum operating current of the heater plate.
- Fan Speed for Heater: Set the operating speed of the heater fan.
- Heater Temperature Limit: Set the maximum heater plate temperature. Heating will be paused when this limit is exceeded.
- Touchscreen Calibration: Calibrate the touchscreen.
- Restore Factory Defaults: Clear all user-defined parameters and data. The registration code will not be erased.
Heating Plate Protection Temperature and Heating Speed Explained
⚠️ The heater module enclosure design has been updated. If you are using V2, do not refer to the previous temperature settings. Please refer to: Heater Module V2
- The recommended heating plate protection temperature should be approximately 10–15 °C higher than the softening temperature of the heating module enclosure. For example, if PETG is used (softening temperature around 70 °C), the heating plate protection temperature should be set to 80 °C.
- The reason why 80 °C does not cause PETG to soften is that the temperature sensor measures the hotspot at the center of the heating plate, not the contact point between the heating plate and the enclosure. In real-world conditions, airflow, screws, and other structural components also affect heat transfer.
- Recommended temperature reference:
- PETG: 80 °C — average heating current about 4 A
- ABS: 110 °C — average heating current about 6 A
- PA6-CF: 150 °C — average heating current about 9 A
- Increasing the heating plate protection temperature also raises the average heating current, resulting in faster heating speed.
- Instead of switching to a more heat-resistant enclosure to improve heating performance, it is recommended to use a larger heatsink. The default recommended heatsink is easy to install, but its power dissipation capability is relatively limited.
Usage Workflow
- Whenever you change printing material, select the corresponding material profile on the main screen.
- Tap Working on the screen to put the system into ready state.
- Start a print job on your 3D printer. The system will automatically detect printer activity via the PIR sensor. Once printing is detected, SmartChamber-3D will start operating and perform automatic chamber temperature control.
- After printing is completed, no manual operation is required. The system will automatically enter standby mode and wait for the next print job.
- In most cases, you do not need to interact with the system unless you change printing materials.
Parameters and Safety Tips
- For first-time use, start with lower heating power, then increase after confirming temperature stability.
- Heater plate temperature protection must be enabled to avoid over-temperature risks.
- 4-wire fans are recommended with PWM control for more stable airflow.